
Survival bushcraft: how to build a lean-to shelter and go tent-free camping
Our new bushcraft guru Simon Curran thinks that tents are over-rated. Here’s why, and how to build a lean-to shelter for tent-free camping
Photography MKS Photography
After an awesome day in the outdoors and an amazing evening round the camp fire, why lock yourself in a ripstop bubble and detach yourself from the spectacular nights?
I say tents are over-rated. We don’t need them! There are a dozen camp setups that keep you connected to nature through the night, from hammocks to tarps and bivis, but lean-to shelters are the most natural option.
There are as many types of shelters as there are styles of tents. Like tents, each one fits a certain situation or environment. Today, we’re going to look at the lean-to. If you try this, trust me, your mornings will be on another level…
Survival tips
In extreme conditions you would survive:
- 3 minutes without oxygen
- 3 hours without shelter
- 3 days without water
- 3 weeks without food
There is a big difference between making a shelter in a survival situation and making one for fun. A survival shelter is all about trying to maintain body temperature. Make it small, snug and efficient. It’s about hunkering down and waiting until first light. Body regulation is the first survival priority you can control, so in an emergency first get a shelter up, then worry about fire.
Quick knots: how to tie a square lash
The square lash is a really useful knot to have in your bag of tricks. It’s perfect for lashing sticks or branches together, so comes in very handy when building a lean-to shelter outdoors.

- Start by tying a simple clove hitch knot to your first branch
- Lash your second branch at right angles to the first, wrapping the rope over and under
- Wrap a few more turns around the knot to form the square shape
- Finish with a few half hitches to secure the knot
How to build a lean-to shelter outdoors
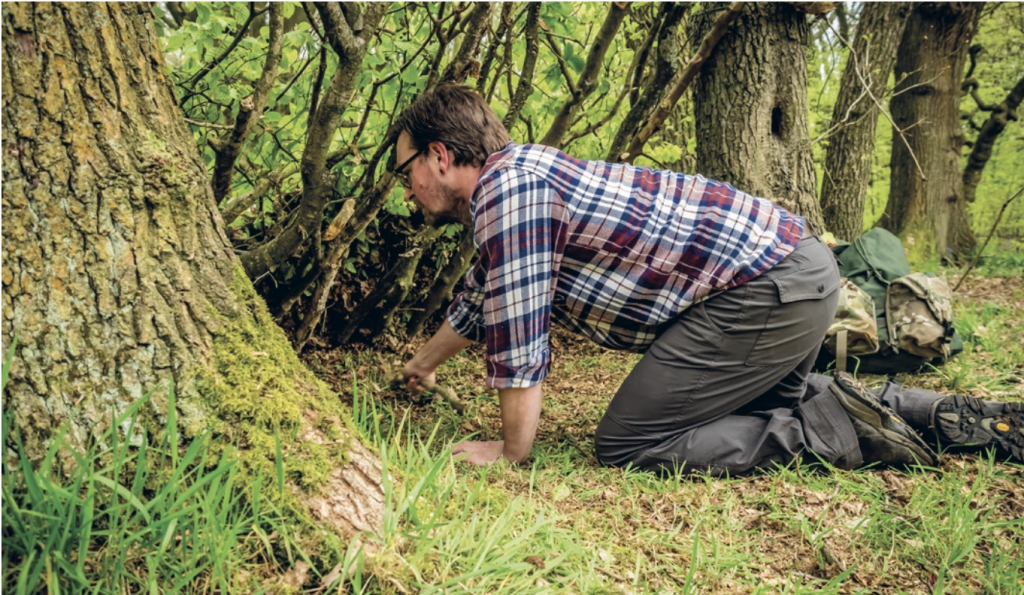
1. Location, location, location
As with any camp, finding the right spot is key, and knowing what to look for is essential.
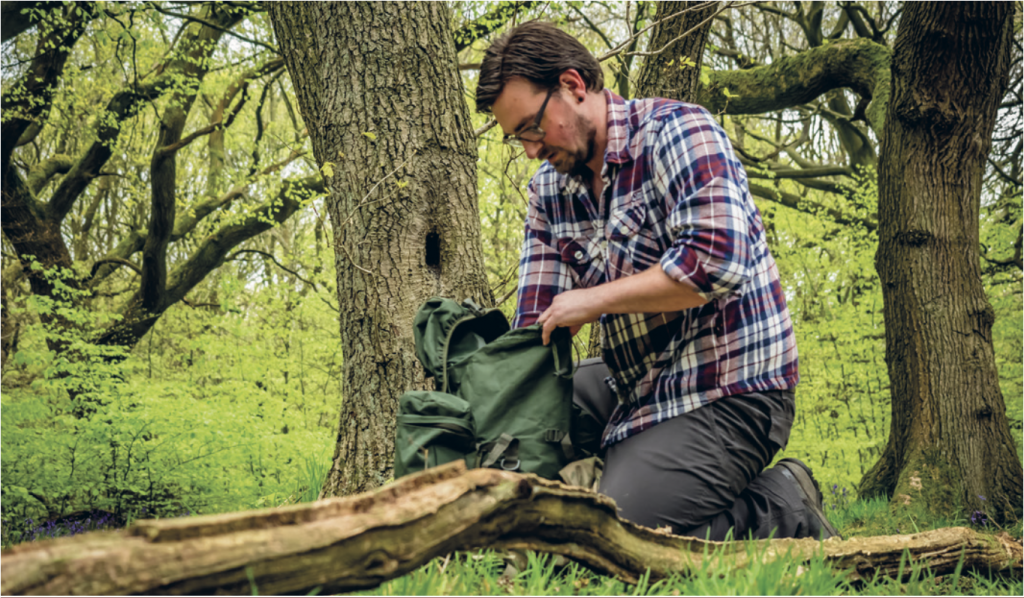
You’re looking for a pair of trees with a clearing in front where you could build a good camp-fire. When choosing the trees, look at the ground to make sure you won’t end up lying on any big roots, rocks or dips in the ground. Remember, the bigger the shelter, the harder it will be to warm up, so make it snug.
Think about how high you are, too — cold air settles at the bottom of valleys and you’re more exposed to the elements at the top. Get down low to get a bunny’s eye view of your camp: is it as level as you thought?
2. Square lash knot
The square lash is a tried and true knot to use.
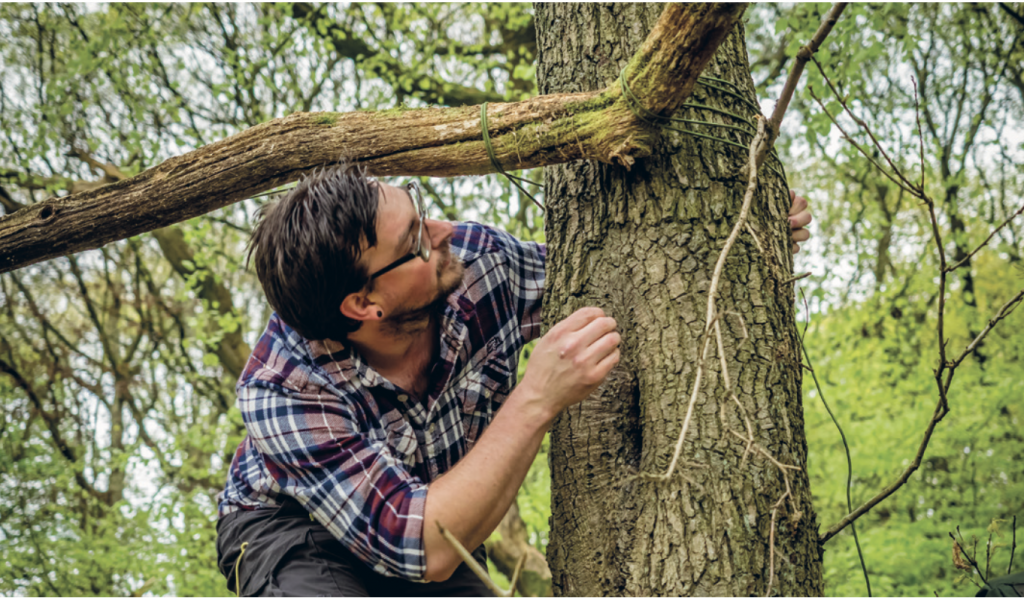
It’s quick, simple and very effective. But if all you know is the double knot you tie your shoes with, then go with that. As long as the ridge line is tight, secure and safe then use what you know.
Get a tree limb (green if you can – the flexibility helps a lot) that’s a little bit longer than the trees you have. It needs to be hung around 4 feet off the ground. Lash it to the front of your trees (the opposite side to where you’ll lie down).
3. Get your sticks together
You’ll need as many limbs as you can find.
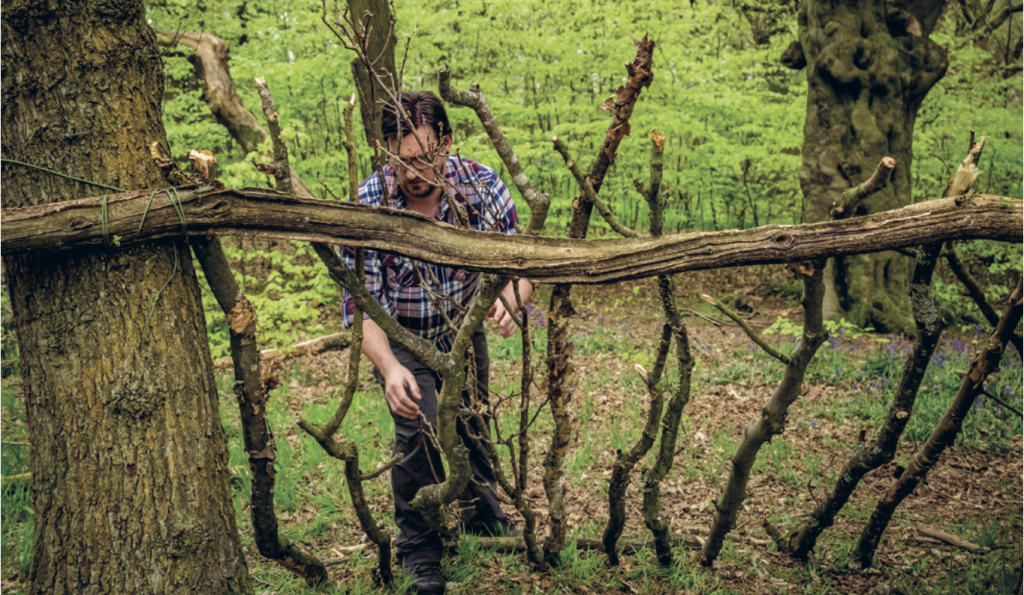
They need to be about as tall as you are with your arm in the air (7ft-ish). Lie them against the ridgeline tree limb, evenly spaced, and at an angle of around 45 degrees. Lie a log on the floor in front of them to keep them all in line. This will also help with insulation later down the line.
Make sure your tree limbs are clear of any unnecessary branches, but a few that reach across the shelter will help hold the debris, moss or leaves in place later.
4. Set up your lean-to
Once the main frame is set, fill in the gaps with smaller branches.
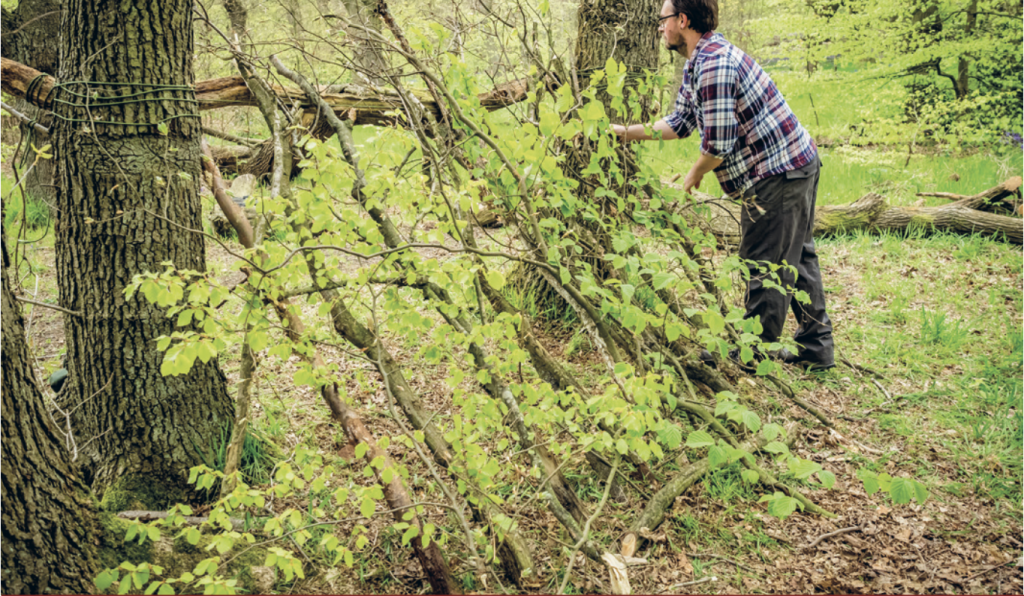
It’s at this point that you can start to leave more branching fingers on the limbs as long as they face outwards (still remove any unwanted ones though). The more time you spend getting this right the better. You might find you try one limb on three or four spots before you find a place that it fits just right.
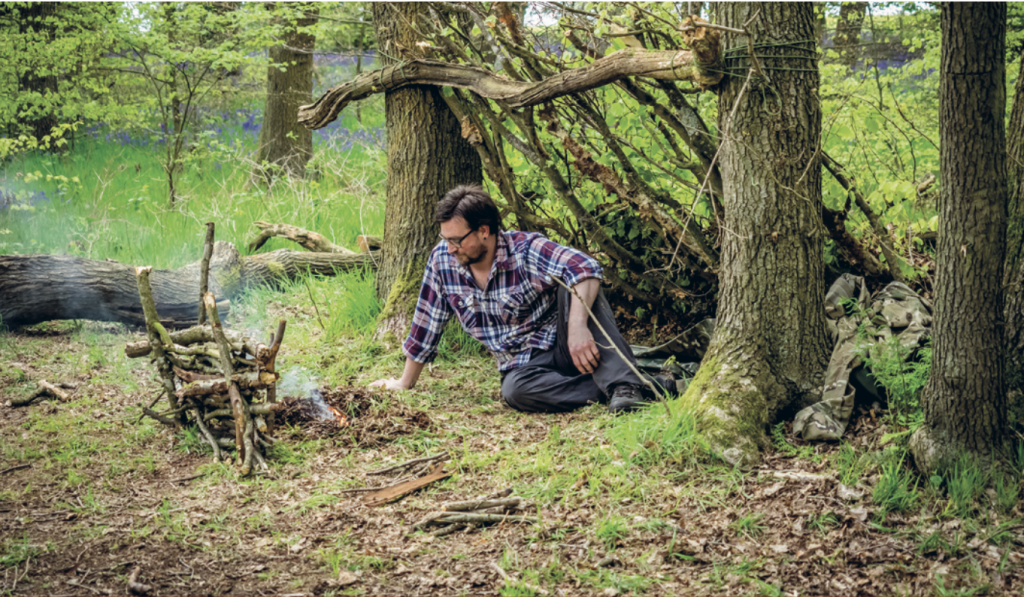
5. Insulation your shelter with seasonal debris
Time to cover the shelter with whatever is available.
If you have a space blanket or an emergency shelter you can lay that on first but it’s not essential. Leaf litter is great. Just kick the ground debris into a big mound. Grab armfuls and pile it up against your shelter. Work your way from the ground up and keep it thick. You want to aim for about a foot in thickness.
After that, layer up branches with green leaves and thatch again, from the ground up. Or cover it in sods of moss. It also helps to put a few extra branches on the outside to stop your debris slipping.
As the seasons change the resources change too — in winter the ground is thick and mulchy which blocks the wind and rain and radiates a lot of heat. In summer the ground is pretty sparse but you will have broad green leaves to break up the breeze, redirect rain and offer shade from the sun. The shelter will still soak up the fire’s warmth but it will also allow for ventilation.
6. Dress it up
Adding the finishing touches makes this a real home from home. Add a few springy bows for insulation from the cold ground.
Remember: ‘every layer under you, is worth two on top of you’. A reflector wall will help bounce back the warmth of the fire into your shelter. The angle of your shelter then sends it right where you lie.
Clear your living space of undergrowth, organize your woodpile and enjoy!
See more from Simon and follow his adventures on Instagram.